A new roof is one of the biggest projects most homeowners ever take on, and it’s normal to feel uneasy about it. How loud will it be? Do I need to be home? What happens if they find rotted wood? Will my flower beds survive?
This guide walks through the full roof replacement process for a typical New Jersey home, so you know what’s happening at every stage and what a quality job should look like.

How Long Does the Roof Replacement Process Take?
For most single-family homes with asphalt shingles, the actual installation takes one to three working days. Larger or steeper roofs, multiple layers of old shingles, significant deck repairs, or complex details like several chimneys and skylights can add time. Weather is the biggest wild card: roofers won’t tear off a roof when rain is in the forecast.
Here’s the full timeline, from first call to final walkthrough, in 9 steps.
Step 1: Roof Inspection and Measurement
Every good project starts on the roof, not on the phone. During the inspection, your roofer should:
- Measure the roof and note pitch, layers, and complexity
- Check the deck for soft or spongy areas
- Examine flashing at chimneys, walls, skylights, and vents
- Look at the attic for ventilation, moisture, and past leaks
- Check gutters and roof edges
Ask to see photos of what they find. You should understand why a replacement is being recommended, not just be told you need one. If you’re still deciding, read Roof Repair or Replacement? How to Make the Right Choice.
Step 2: Estimate, Material Choices, and Contract
Next comes a written, itemized estimate. This is also when you’ll choose:
- Shingle type and color, such as architectural or premium designer shingles
- Underlayment and where ice-and-water shield will be installed
- Ventilation, such as ridge vent and soffit intake
- Drip edge and flashing colors to match gutters and trim
New Jersey law requires home improvement contracts over $500 to be in writing, and it generally gives homeowners three business days to cancel after signing. Your contract should include the contractor’s NJ Home Improvement Contractor registration number, the full scope of work, the price for any deck replacement, the payment schedule, and warranty terms.
Want to understand pricing before you meet with a roofer? See our roof replacement cost guide for New Jersey.
Step 3: Permits and Scheduling
For a standard shingle replacement on a one- or two-family home, New Jersey generally treats the work as ordinary maintenance, so a construction permit is often not required. Structural work, some deck replacement, multi-family and commercial buildings, and homes in historic districts can require one. Your contractor should confirm requirements with your town’s construction office before work begins.
Then materials are ordered and a start date is set, with a watchful eye on the weather forecast.
Step 4: Preparing Your Home
A few simple steps make installation day go smoothly:
- Move vehicles out of the driveway and garage. The dumpster and material delivery need space.
- Protect items in the attic. Vibration and debris can shake dust and old nails loose. Cover stored belongings with sheets or tarps.
- Take down wall hangings on top-floor walls. Hammering can make them shift or fall.
- Move patio furniture, grills, and potted plants away from the house.
- Plan for pets. It’s loud. Many dogs and cats are happier with a friend or in a quiet room for the day.
- Give your neighbors a heads-up. They’ll appreciate knowing about the noise and trucks.
You generally don’t need to be home during the work, but make sure the crew can reach you if they find something unexpected.
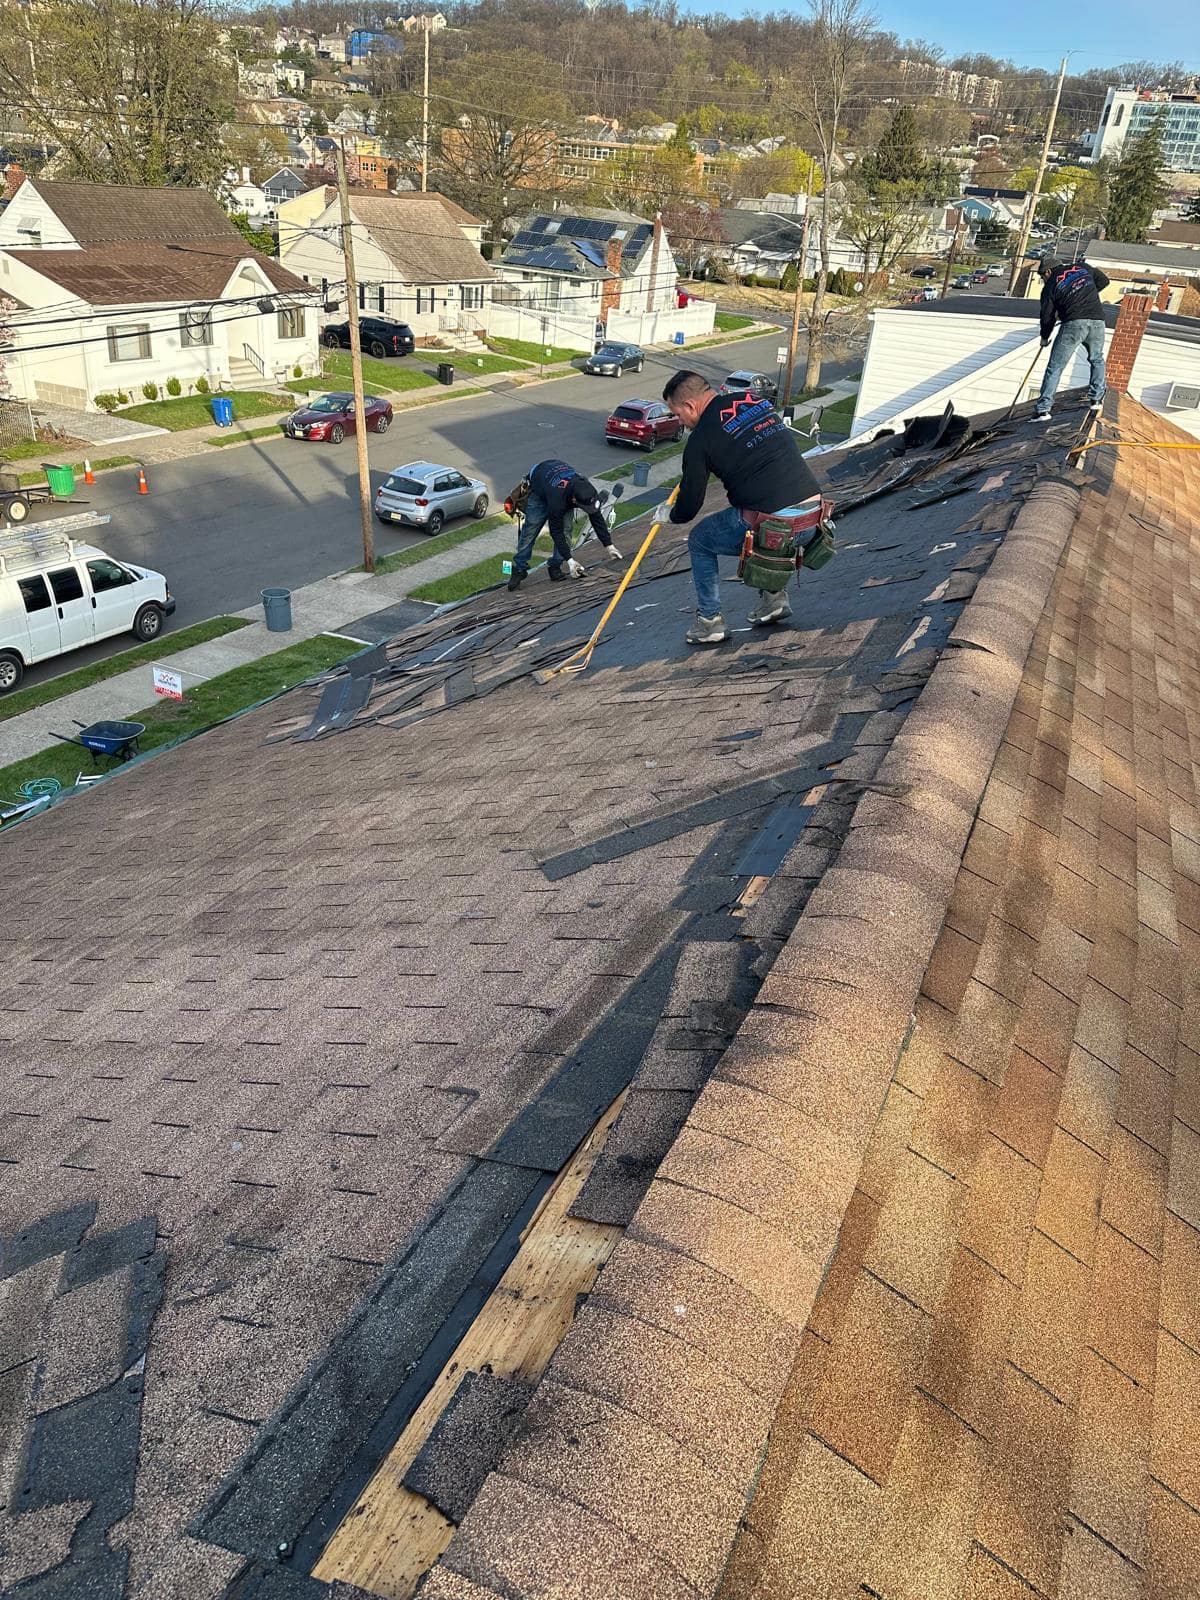
Step 5: Tear-Off
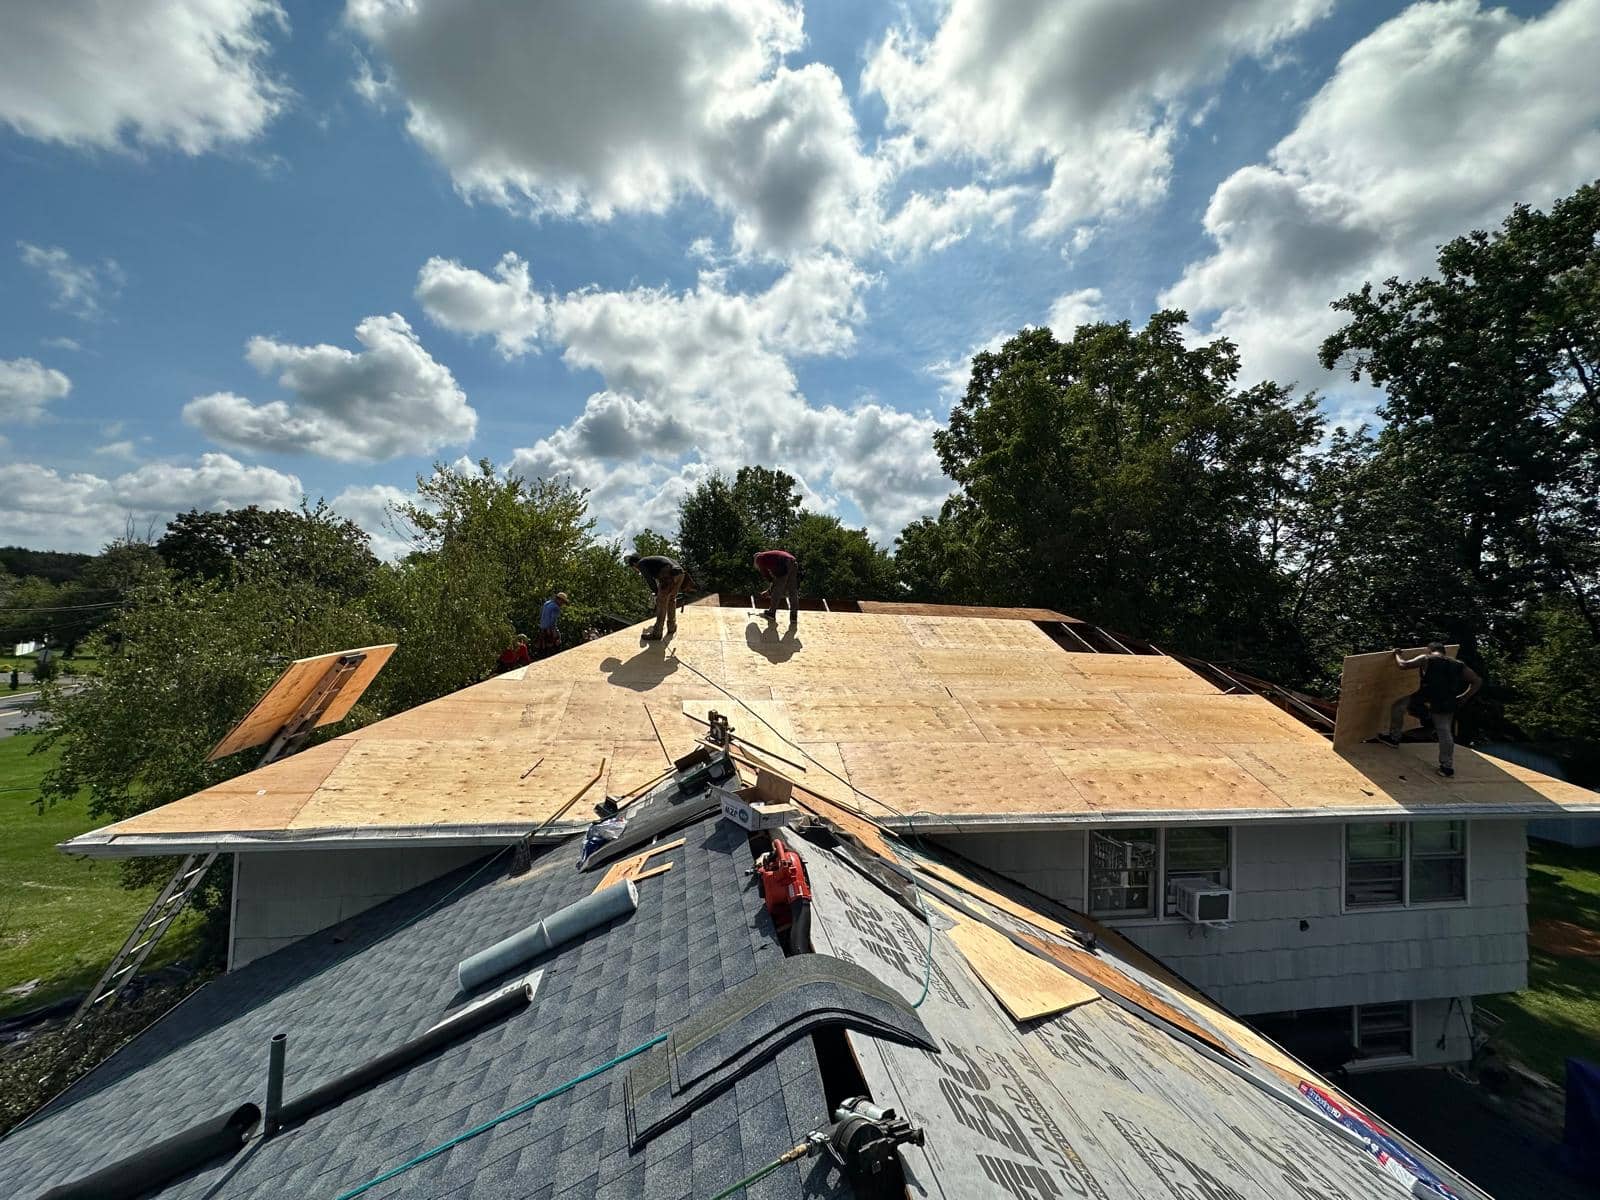
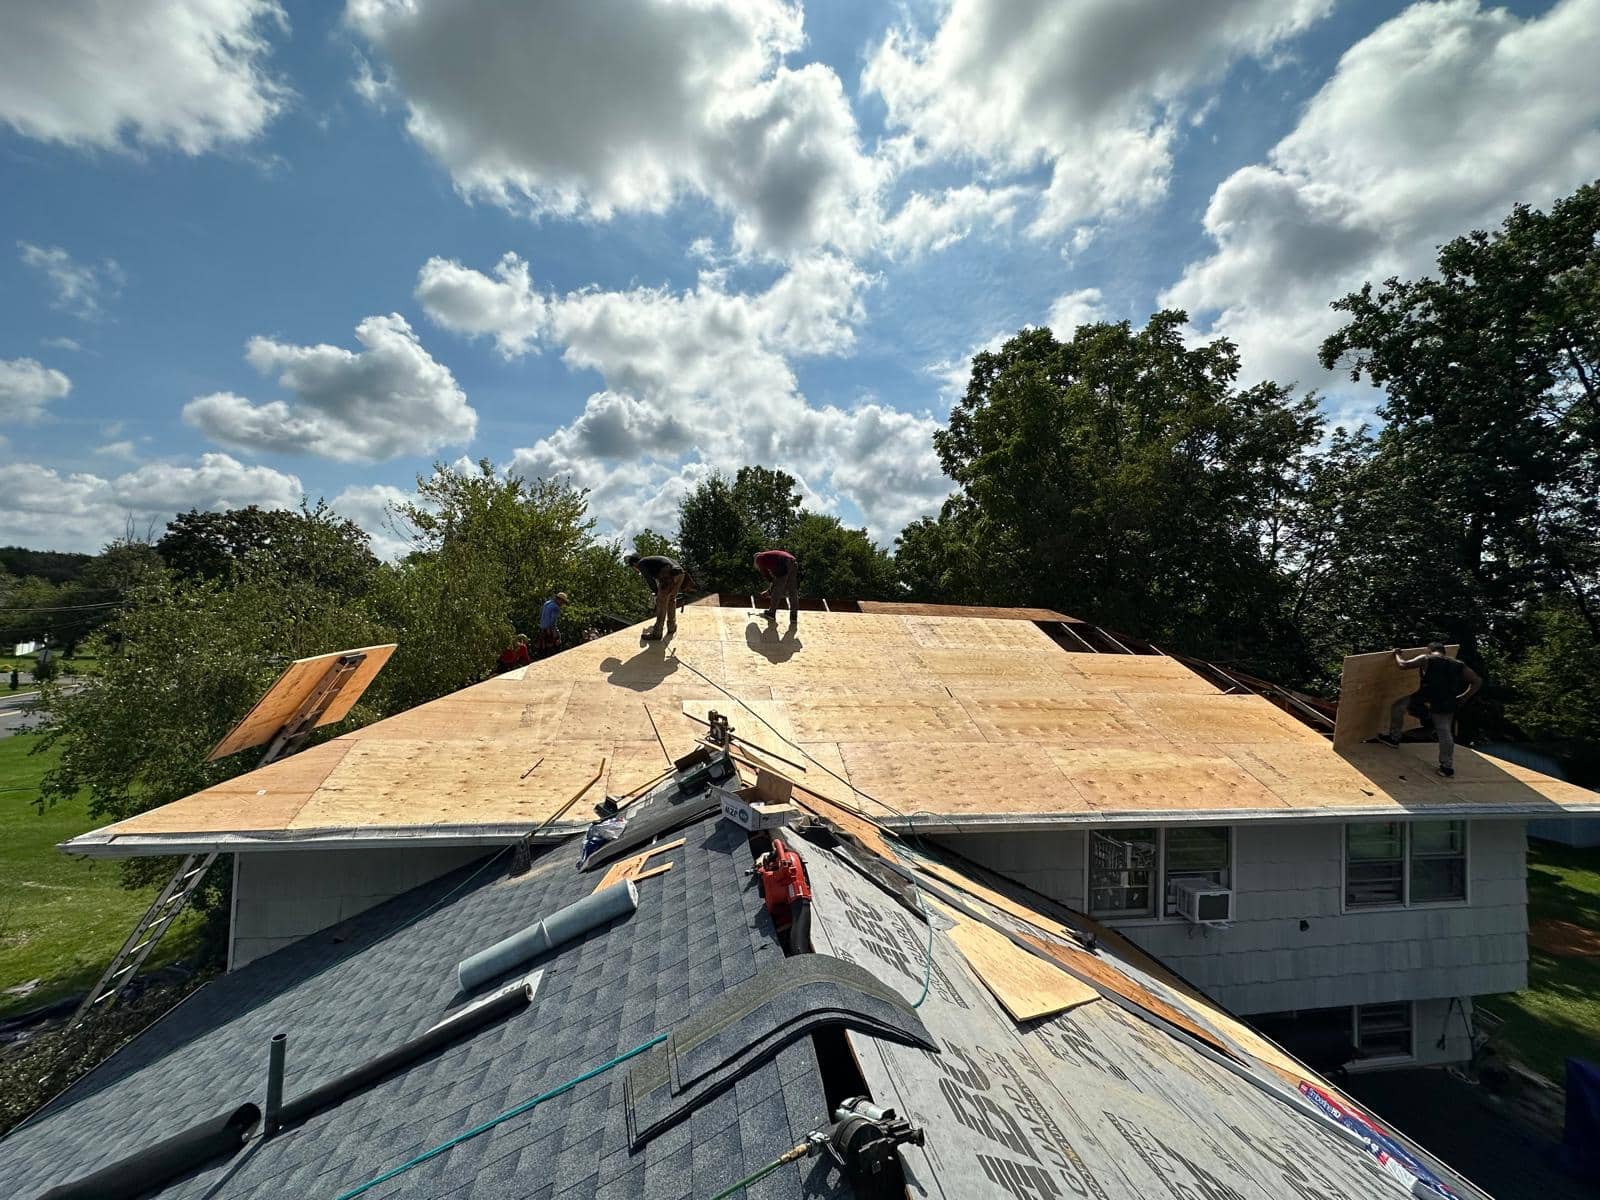
The crew protects landscaping, windows, and siding with tarps, then removes the old shingles, underlayment, and worn flashing down to the wood deck. Debris goes straight into the dumpster.
This is the loudest part of the job. It’s also the most important, because it’s the only time anyone can see the deck.
Step 6: Deck Inspection and Repairs
With the roof stripped, the crew checks the deck for rot, soft spots, and damage. Any bad sheathing gets replaced with new plywood or OSB. This is the step that separates a roof that lasts from one that fails early: new shingles nailed into rotted wood won’t hold.
A reputable contractor will show you the damaged areas and charge the per-sheet price listed in your contract, with no surprises.
Step 7: Installing the Roof System
A roof is a system, not just shingles. In order, the crew installs:
- Drip edge along the eaves to direct water into the gutters
- Ice-and-water shield at the eaves, valleys, and around chimneys and skylights, which is the key defense against ice dam leaks in New Jersey winters
- Underlayment across the rest of the deck
- Drip edge on the rakes (the sloped sides)
- Starter strip along the edges to seal the first row of shingles against wind
- Flashing: new step flashing at walls, new pipe boots, and chimney and skylight flashing
- Shingles, installed to the manufacturer’s nailing pattern
- Ridge vent and ridge cap shingles to finish the peak and let the attic breathe
Following the manufacturer’s installation requirements matters for more than quality. It’s usually a condition of the material warranty.
Step 8: Cleanup and Nail Sweep
Old roofs leave behind thousands of nails. A proper cleanup includes clearing debris from gutters, lawns, driveways, and flower beds, and running a magnetic sweeper over the entire work area, often more than once.
Step 9: Final Inspection and Walkthrough
Before the job is closed out, the roof should be inspected for proper shingle alignment, sealed flashing, secure ridge caps, and clean edges. Walk the property with your contractor, ask questions, and make sure you receive your warranty paperwork.
Signs of a Well-Run Roof Replacement Process
Not sure whether your contractor is doing things right? Good crews tend to share a few habits:
- They tear off only as much roof as they can cover the same day
- They show you deck damage before replacing it, instead of just adding it to the bill
- They replace flashing and pipe boots rather than reusing worn ones
- They protect landscaping and clean up at the end of every workday, not only at the end of the job
- They give you a clear point of contact and keep you updated when weather changes the schedule
Frequently Asked Questions
Can a roof be replaced in the winter in New Jersey?
Yes, on dry days above the temperature minimums set by the shingle manufacturer. Shingles seal best in warmer weather, so installers may hand-seal shingles in colder months. Spring and fall remain the most popular seasons.
What happens if it rains during my roof replacement?
Crews typically tear off only as much roof as they can dry-in the same day. If weather moves in unexpectedly, exposed sections are covered with underlayment and tarps until work resumes.
Do I need to replace my gutters with my roof?
Not always. But if your gutters are damaged, sagging, or undersized, replacing them with the roof avoids disturbing the new drip edge later.
Will my new roof come with a warranty?
Most new roofs come with two warranties: the shingle manufacturer’s material warranty and the contractor’s workmanship warranty. Ask for both in writing, and ask what each one covers.
Need gutter work along with your new roof? We handle both.
Ready to Start Your Roof Replacement?
Unlimited Pro Construction has completed more than 1,200 projects over 25+ years for New Jersey homeowners in Bergen, Passaic, Essex, Morris, and beyond. We’ll walk you through every step, from the first inspection to the final walkthrough. You can see examples of our work in our project gallery.
Learn more about our roof replacement services or schedule a free roof inspection.
Call (973) 666-2870 for a free inspection and on-site estimate.
Unlimited Pro Construction
NJ License #13VH11083200
32 Samuel Avenue, Clifton, NJ 07013